Are you looking for a more unique and immersive typing experience? Building your own custom keyboard from scratch is one of the best ways to get a beautiful, personalized setup that will ensure you stay comfortable while typing — all without sacrificing performance or spending too much money.
In this ultimate guide, we’ll show you how to create your own custom mechanical keyboard using simple tools and the right parts — including DIY kits if needed. So let’s get started!
Gather the necessary materials and tools for building a custom keyboard
Whether you’re a seasoned DIY enthusiast or a curious beginner, ensuring you have everything you need is crucial in achieving a successful final project. From switches to keycaps, each component plays an important role in creating a keyboard that fits your specific needs and preferences. Companies like GoblinTechKeys offer a variety of options for customizing your keyboard and provide guidance on selecting the right materials for your build. So before you start your project, take the time to gather the required equipment to have a smooth and enjoyable experience creating your perfect custom keyboard.
Learn the basics of soldering and desoldering
Soldering is a basic skill that can be useful for both DIY enthusiasts and professionals. It involves melting a thin wire, called a solder, to fuse two metal surfaces together. Soldering is not difficult to learn, but it does require patience and practice. Here’s what you should be aware of:

- Ensure that both surfaces are clean and free of any debris or oil.
- Once the surfaces are properly prepared, heat the joint with a soldering iron and feed the solder into the joint.
Desoldering involves removing the solder from old or damaged equipment. This can be done using a soldering iron with a desoldering braid or a desoldering vacuum. These techniques can save you money and make you learn a new DIY skill on top of that!
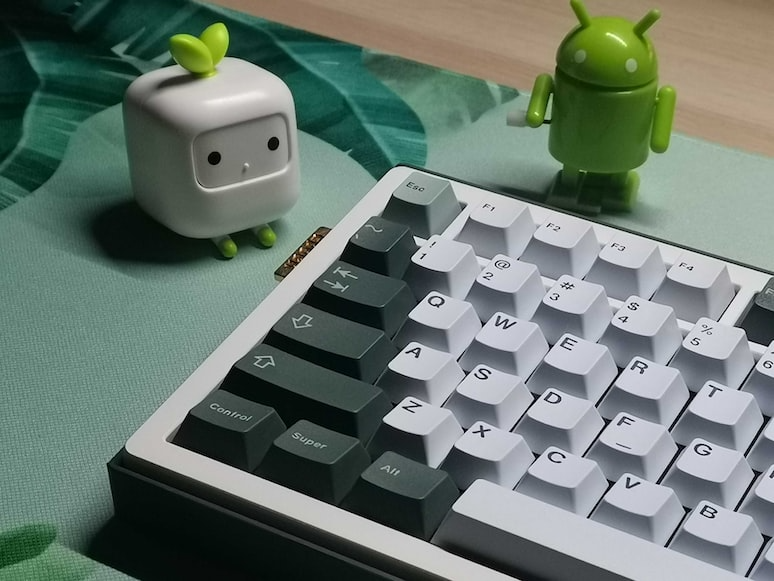
Familiarize yourself with keycap styles and shapes
When customizing your mechanical keyboard, one of the most important decisions is choosing the keycaps. Keycap styles and shapes have a significant impact on both the look and feel of your keyboard.
From the classic spherical shape of the SA profile to the low-profile chiclet style of DSA, there are plenty of options to choose from — and you’ll be able to create a more personalized typing experience that feels great and looks even better.
Understand the various components that make up a custom keyboard
Custom keyboards are more than just a tool for typing. They’re a reflection of the user’s personality and preferences. To fully understand the components of a custom keyboard, it’s vital to take a closer look at each aspect — the keycaps, switch type, material quality, layout, and LED backlighting all contribute to the overall look and feel of the keyboard. Let’s quickly break these elements down.
- Keycaps can showcase different colors, fonts, and symbols.
- Switch type impacts how the keyboard feels when pressed.
- Material quality determines how durable and long-lasting the keyboard will be.
- Layout and LED backlighting have an impact on both the aesthetics and the functionality of the keyboard.
Choose your switch type and keycaps to create your desired feel and look
Selecting the right switch type and keycaps can make all the difference in your personalized keyboard. Switch types — think of Cherry MX Red or Brown — determine the feel and responsiveness of your keys. Some switches have a lighter touch, making typing faster and more comfortable, while others require more pressure and are better suited for gaming or heavy typing tasks.
Keycaps, on the other hand, allow you to personalize the look of your keyboard. Custom keycaps come in a variety of styles, materials, and colors, letting you bring a unique sense of style to your setup. With so many options available, it’s easy to find the perfect combination of switch type and keycaps to create your desired feel and look.
Assemble your switches, keycaps, and components for the keyboard frame
Building your own keyboard can be a fun and rewarding project, but it’s not easy to assemble all the necessary components. When putting together the frame of your keyboard, you’ll need to make sure that all switches are properly soldered to the circuit board and that the keycaps are securely in place. This process is time-consuming, but with patience, it can be done without any issues. Additionally, connecting all components — such as LEDs, USB cables, and stabilizers — to the keyboard frame requires a certain set of skills and specific tools.
Finally, once everything is in place, you can give your custom keyboard a test run to see how it feels and if all components are working properly. With a few tweaks here and there, you’ll be able to create a unique experience that’s perfect for anyone looking to get into custom mechanical keyboards.

Building a custom keyboard doesn’t have to be an intimidating task. Doing your research in advance and taking it one step at a time will help you create a stunning and functional keyboard of your own design. You can choose from a variety of switch types, keycap shapes and styles, and components that fit the aesthetic look or performance feel you’re after.
Have fun gathering the necessary materials and tools, brushing up on soldering techniques, and familiarizing yourself with all the components to make building your dream keyboard relatively simple. At the end of the day — whether it’s for gaming or typing, make sure you pay attention to every detail so that your finished product matches your vision perfectly.