Wondershare Filmora is a powerful, easy-to-use video editor designed for beginners and more advanced users. This software offers an impressive set of tools that make it possible to create professional-level videos, even if you’re just starting.
Today, we will examine three advanced editing techniques in Filmora video editing software: multi-camera editing, keyframe interpolation, and planar tracking. These tools might sound complicated, but they’re pretty simple with the right approach!
Multi-camera editing lets you blend different angles to make your video dynamic, keyframe interpolation brings your animations to life, and planar tracking makes it look like text or images are part of the scene. By mastering these features, you’ll be able to make your videos stand out and look incredibly polished. Ready to jump in and discover these techniques? Let’s get started!
Part 1: Multi-Camera Editing for Seamless Multi-Angle Projects
In Filmora multi-camera editing, you use footage from different cameras to show multiple angles in one video. Imagine watching a sports game where the camera switches from player to crowd to referee. It’s all about giving viewers more angles and making your video more engaging and dynamic.
Related Posts

How to Use It?
If you want to quickly bring in footage from different cameras and smoothly switch between angles while editing, just follow these simple steps:
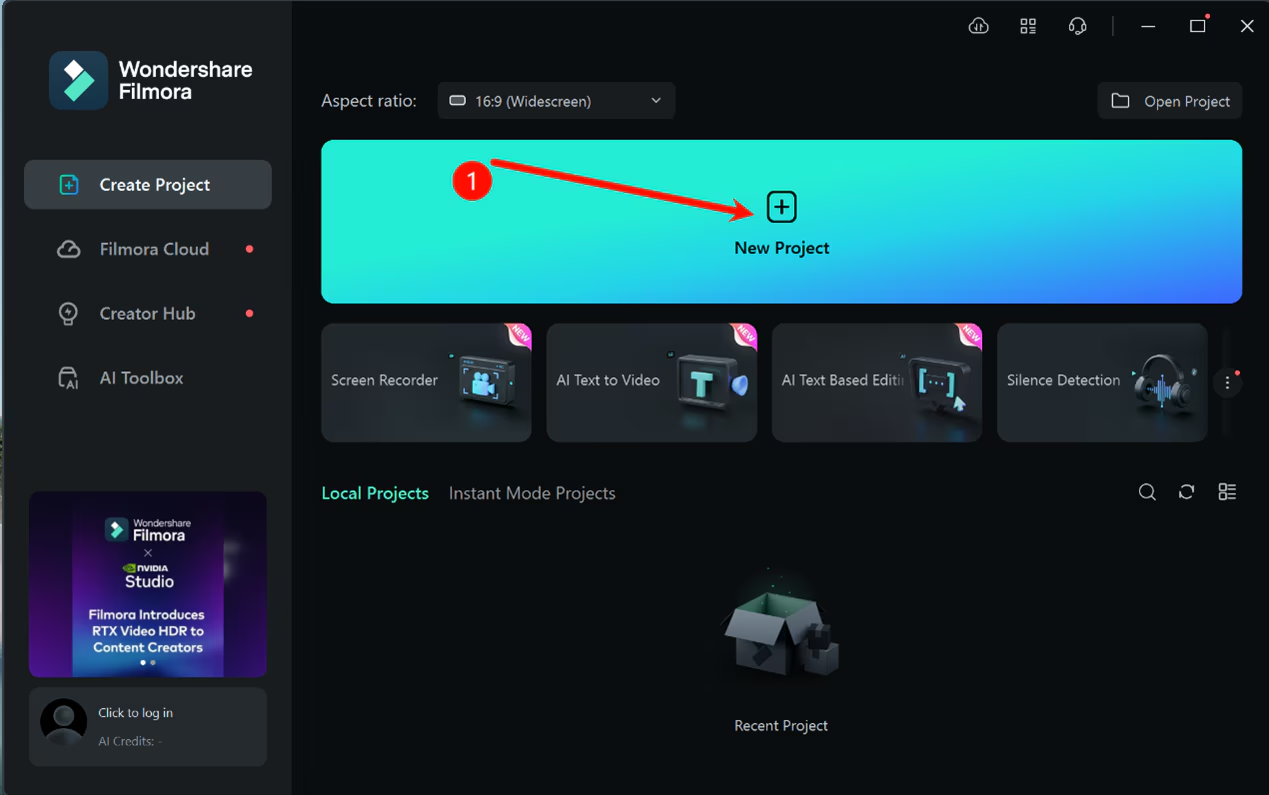
Step 1: Start a New Project
First, open up Filmora Video Editor and log in. Look to the screen’s left side, click “Create Project,” then choose “New Project.” Now, you’re ready to start!
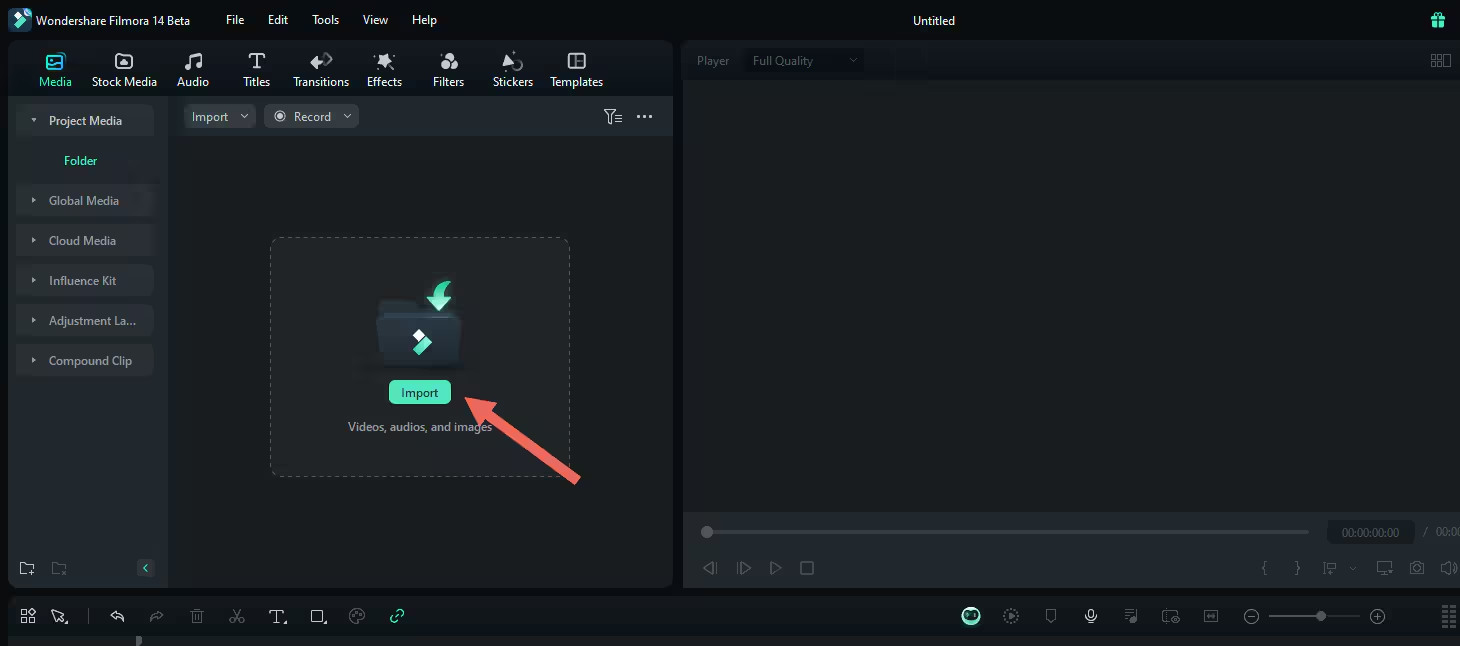
Step 2: Import Your Footage
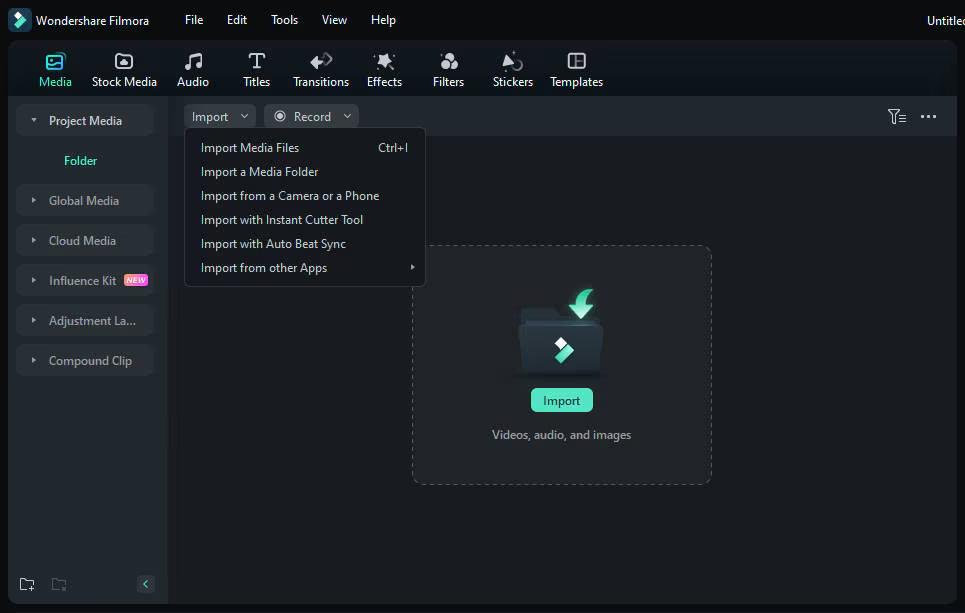
Go to the “Media” tab on the toolbar in the main editing window, then select “Import.” This is where you’ll bring in all your video clips from different cameras.
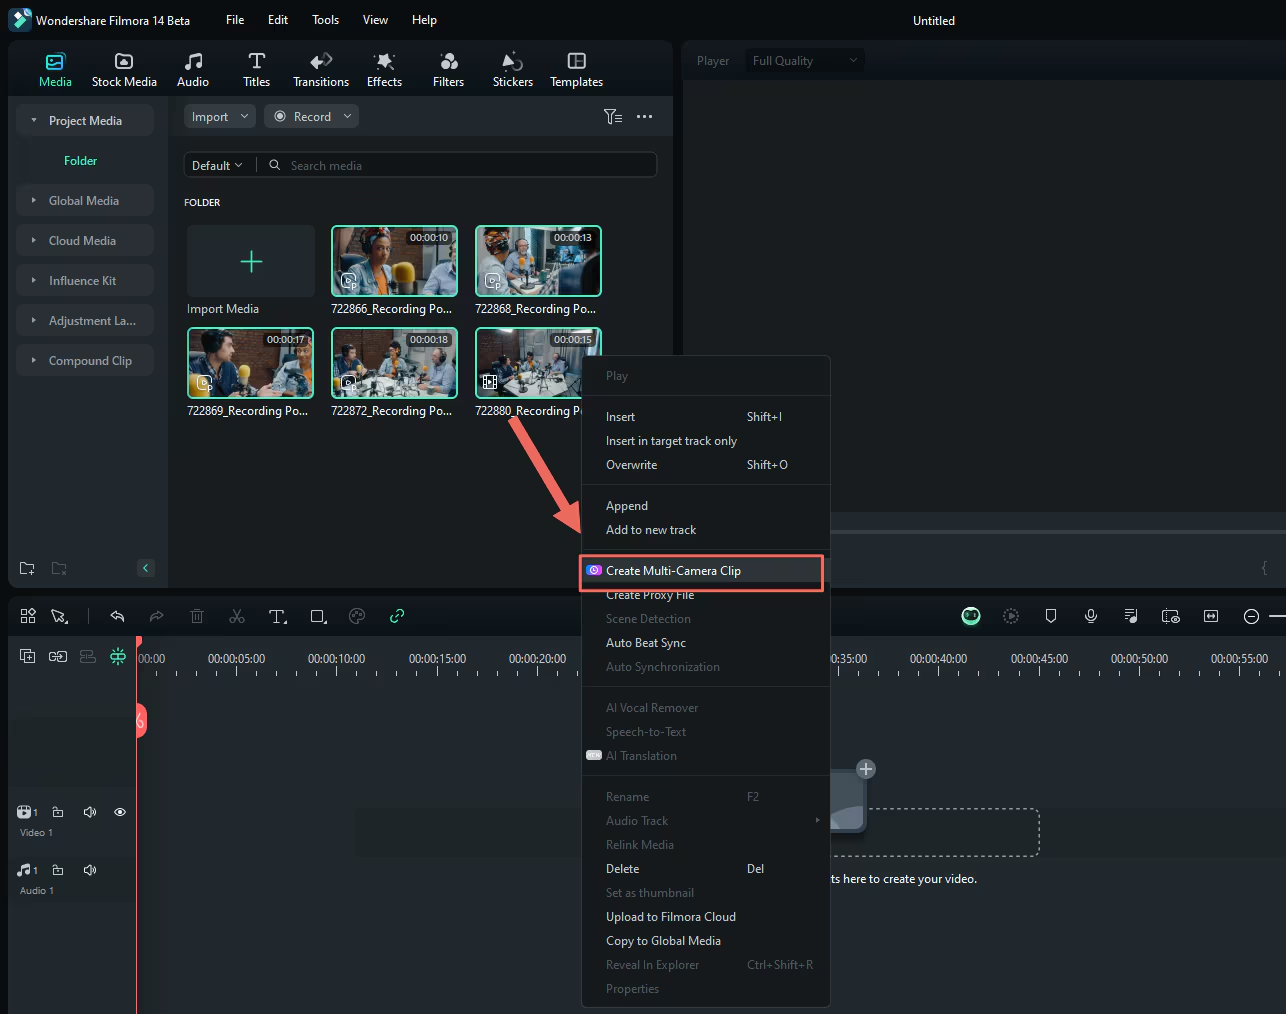
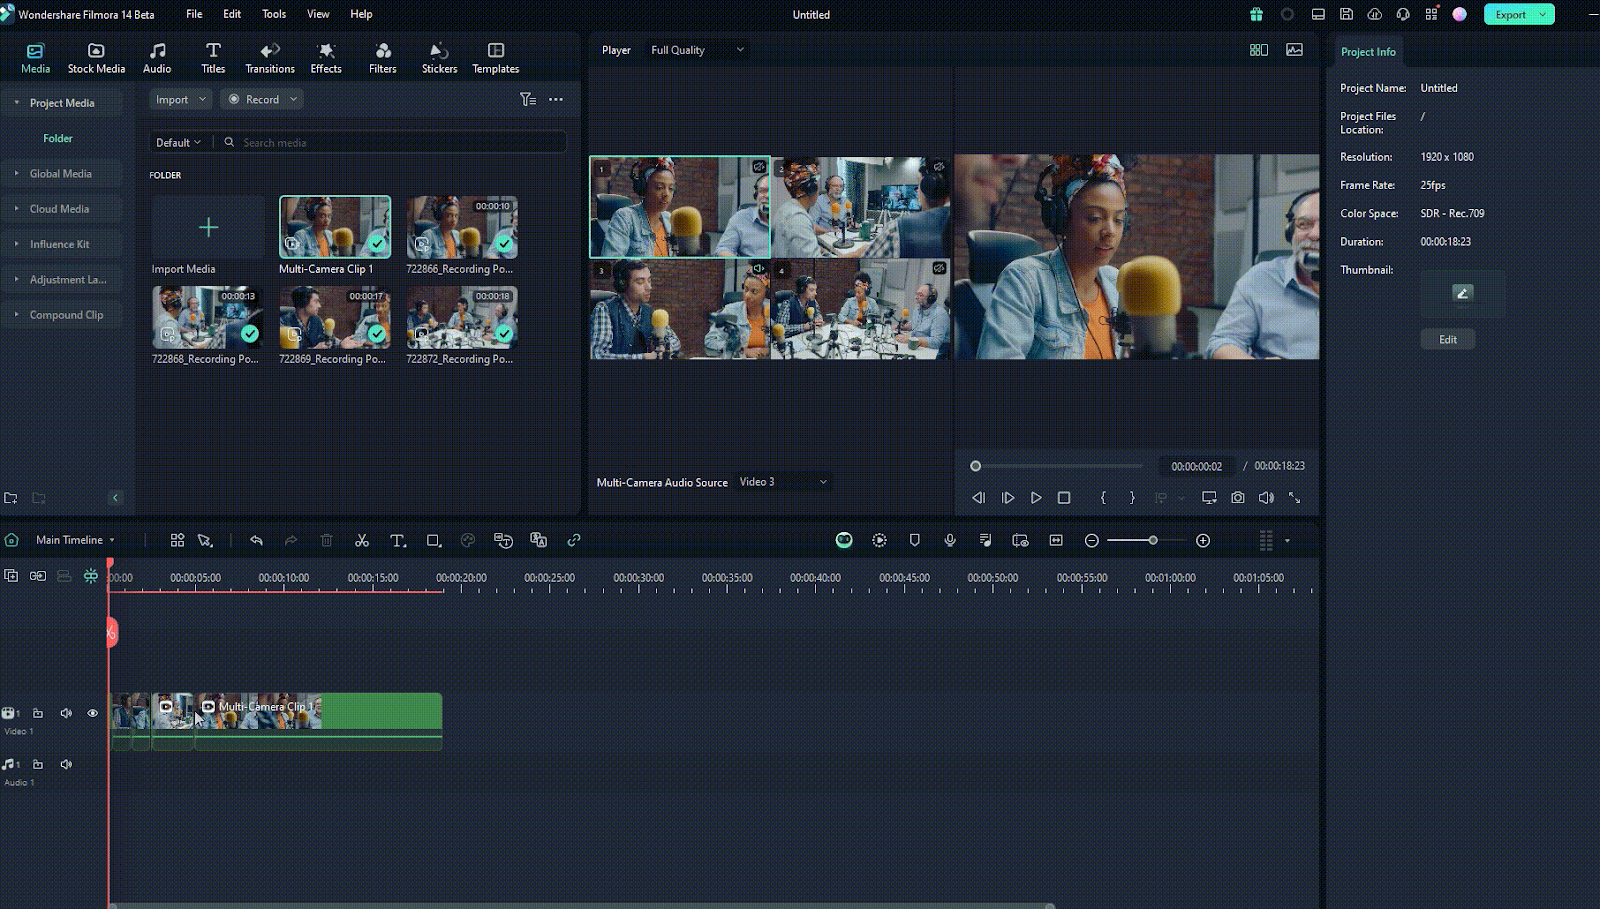
Step 3: Create a Multi-Camera Clip (Two Ways)
You can create a multi-camera clip in two ways:
Method 1: In the media bin, select the clips, right-click, and choose “Create Multi-Camera Clip.”
Method 2: On the timeline, select the clips, right-click, and pick “Create Multi-Camera Clip.”
Give your multi-camera clip a name and choose how to sync them. You can sync by matching:
Audio: The Filmora video editor will line up the audio waveforms from each clip.
First Frame: Line up the first frame of each clip.
First Marker: Use markers if you set them in each clip.
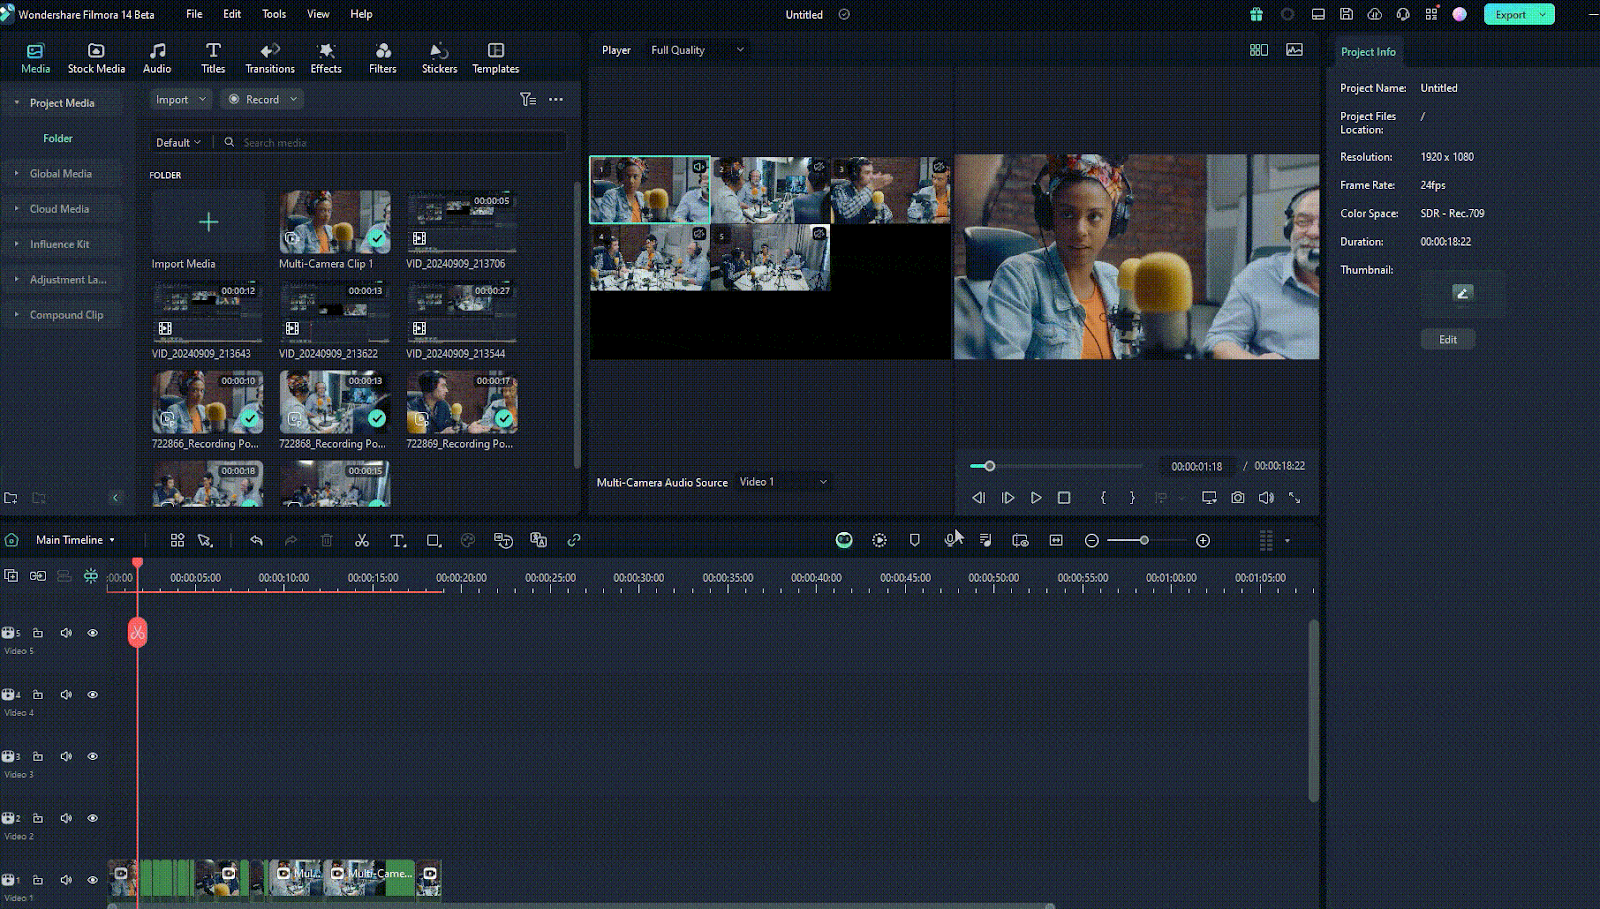
Step 4: Turn On Multi-Camera View
In the player window, click “Switch Multi-Camera View.” This mode shows you all your camera angles simultaneously, so you can easily pick which one you want to use for each video part.
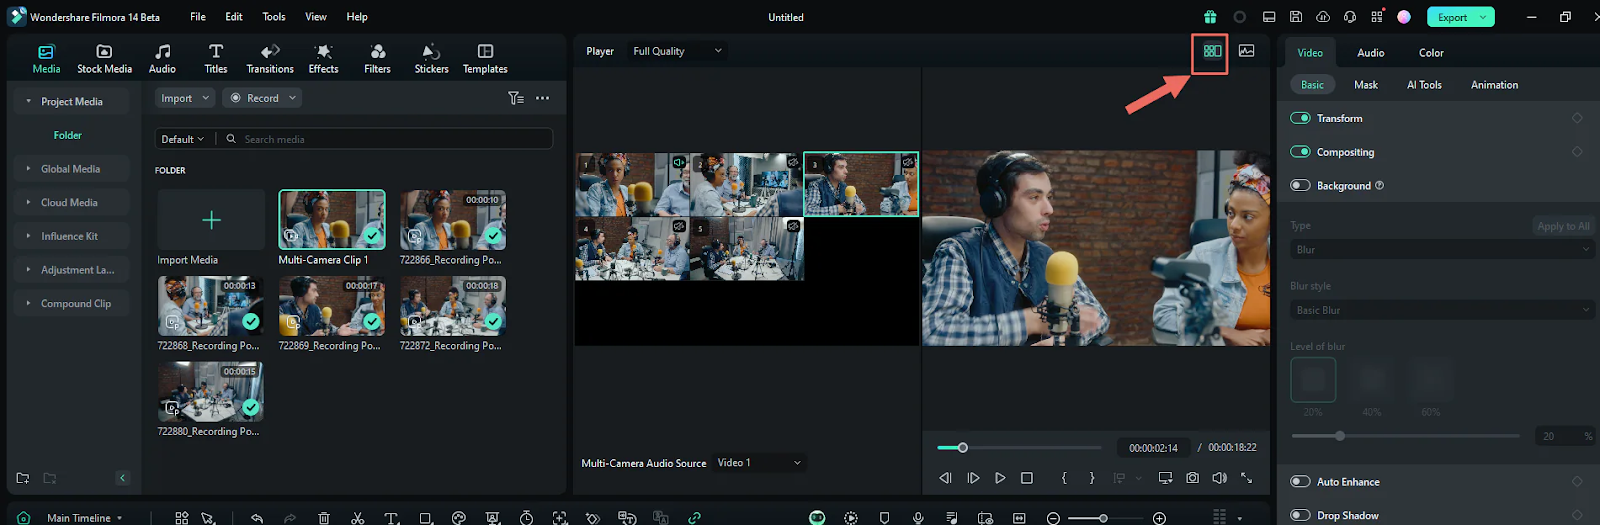
Step 5: Edit the Multi-Camera Clips
Press the spacebar or hit Play to start watching your clips. As the video plays, click on any camera angle in the multi-camera view, and Filmora will switch to that angle in the timeline.
Tip: You can also use keyboard shortcuts to switch between angles. Go to File >> Keyboard Shortcuts to see them.
Step 6: Adjust and Fine-Tune Your Edits
You can refine your edits quickly:
On the Timeline: Right-click on the clip to make changes.
On the Media Tab: Right-click the multi-camera clip to edit it further.
Switch Angles: To change an angle, select the clip and click on the camera view you want to switch to.
For fine-tuning, hover over a cut point until you see a bidirectional arrow. Then, drag it to adjust where the cut happens.
Part 2: Elevate Animations with Keyframe Interpolation Techniques
Here’s a simple guide to adding and editing keyframes in your video using Filmora video editing software. Keyframes are small markers that help you control animations, colors, text, special effects, etc. Once you set them up, you can save them for later use!
Adding Keyframes
Step 1: Import Your Video Clip
First, open the Filmora video editor and add your video by dragging it onto the timeline from your files or library.
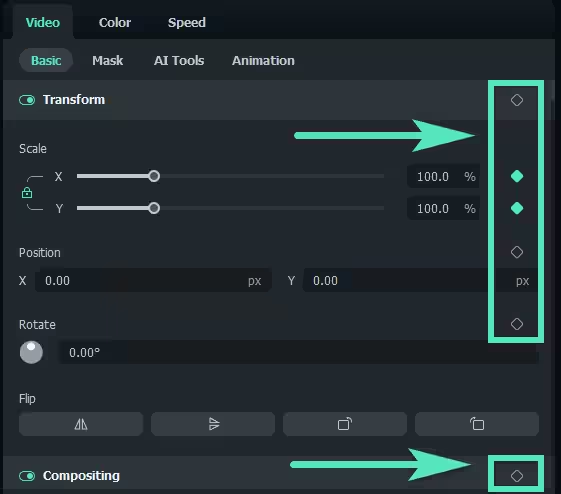
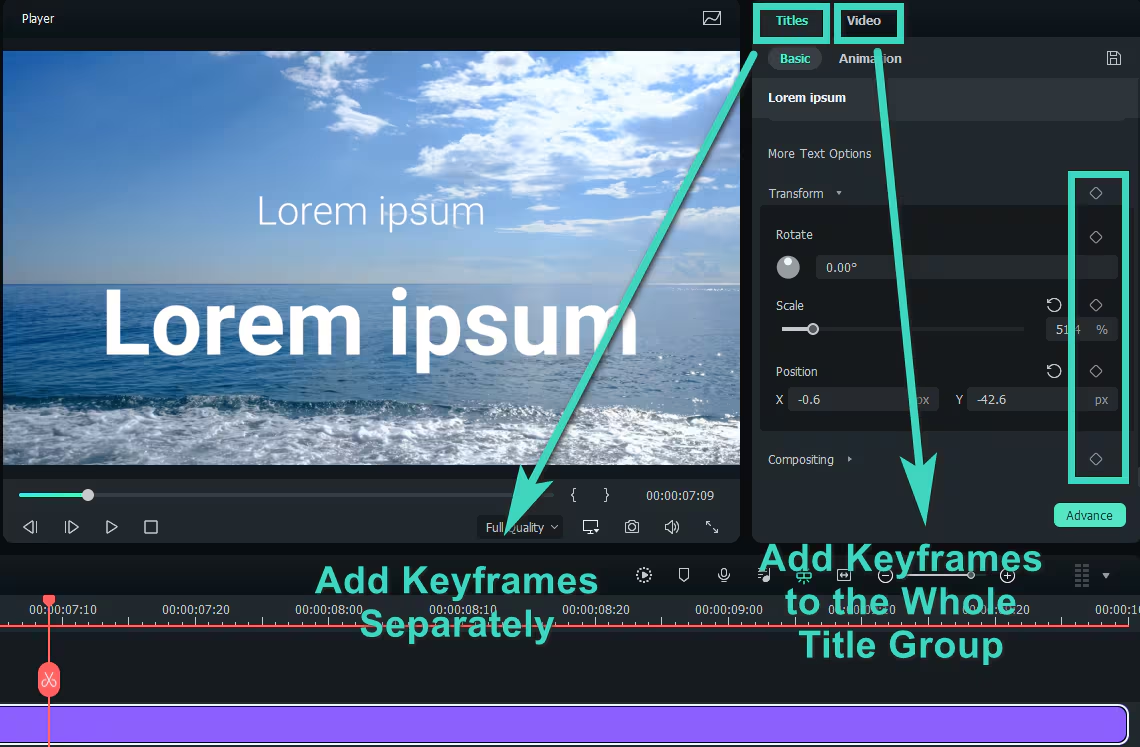
Step 2: Open the Keyframe Tool
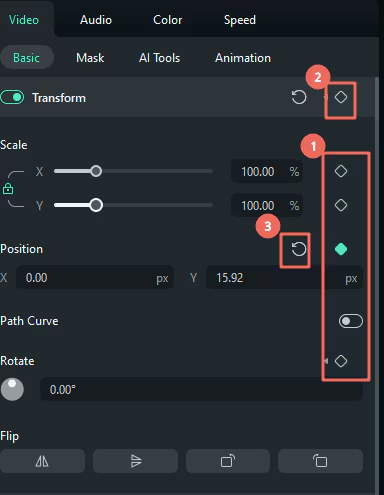
Click on the video clip you added. This brings up a panel on the right side of the screen. Click on “Video,” go to “Basic,” and find the small diamond icon. This diamond icon lets you add a keyframe!
Step 3: Set Your First Keyframe
Move the timeline’s playhead (the line that shows where you are in the video) to the spot where you want the first keyframe. Then, click the diamond icon in the panel to set it.
Editing Keyframes
Once you’ve set your keyframes, you can easily change them.
Step 1: Adjust Settings
Change settings like video position, size, shadow, brightness, etc. Just drag sliders or type in values to see changes instantly. You can adjust audio settings like volume, balance, or fade effects.
Step 2: Add More Keyframes
If you want to change the animation over time, move the playhead to another spot and click the diamond icon to add another keyframe. This second keyframe might be where your animation ends or another place where you want a new effect.
Step 3: Save Your Work
When happy with your keyframes, click “OK” to save. Filmora will automatically create smooth animations between each keyframe.
Deleting Keyframes
If you ever need to remove a keyframe, here’s how:
On the Panel: To delete a specific keyframe setting (like scale or position), click the diamond icon next to that setting. To remove all keyframes from a section, click “Reset.”
On the Timeline: Right-click the diamond icon on the timeline and choose “Delete Keyframe.”
That’s it! With these steps, you can use keyframes to bring your videos to life with smooth animations and fun effects.
Part 3: Realistic Visuals with Planar Tracking
Planar tracking is a video editing and visual effects technique that tracks flat surfaces within a video. It accurately follows objects on a two-dimensional plane, like billboards or screens, allowing for advanced editing and integration of visual elements. This tool is handy for tasks like blurring a license plate or replacing a billboard in a scene.
Here’s a simple guide to using Planar Tracking in the Filmora video editor! Let’s get started!
Step 1: Import Your Video
First, open Filmora on your computer. Import the video you want to work on and add it to the timeline at the bottom.
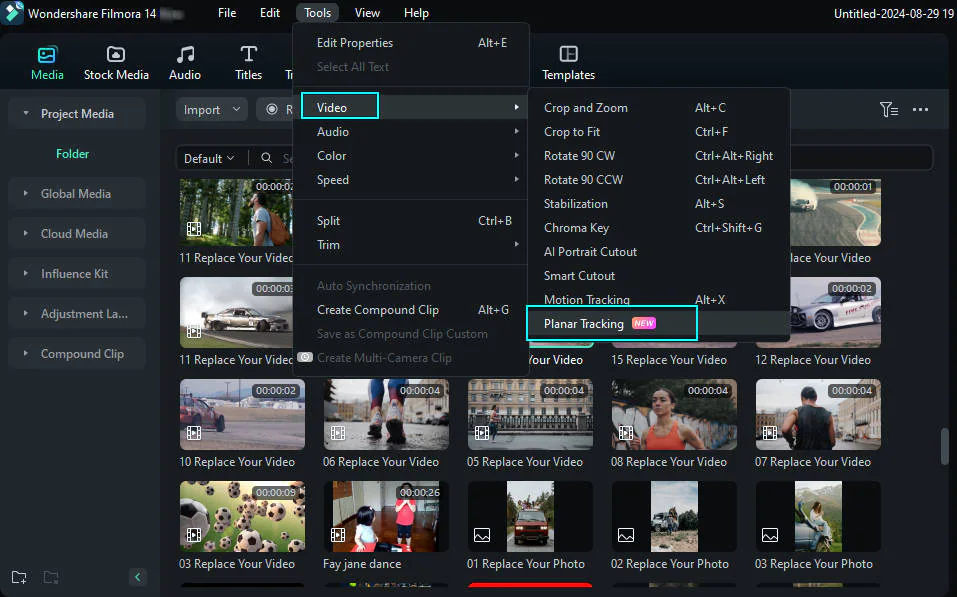
Step 2: Find the Planar Tracking Tool
There are three easy ways to open the Planar Tracking tool:
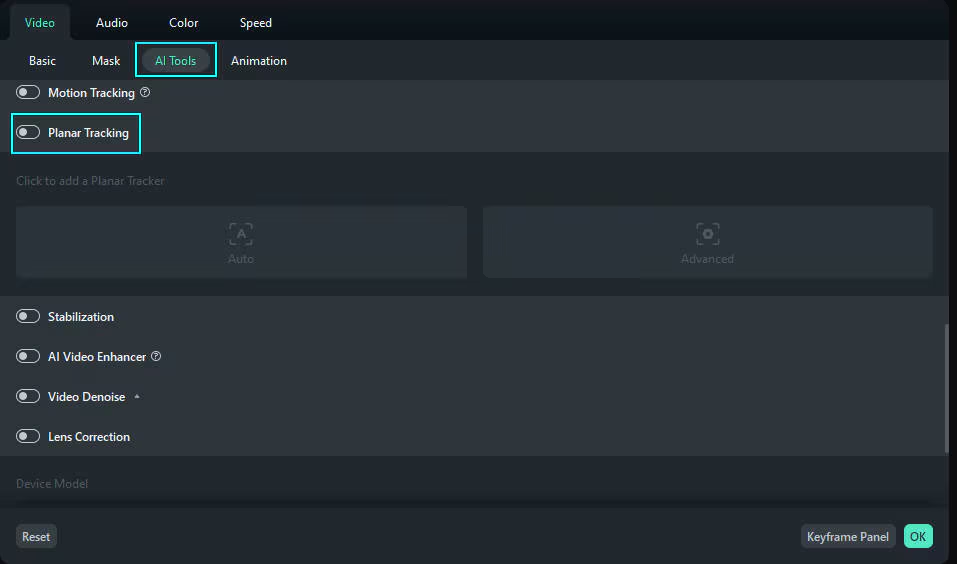
Method 1: Double-click on your video clip, go to video> AI Tools, and turn on Planar Tracking.
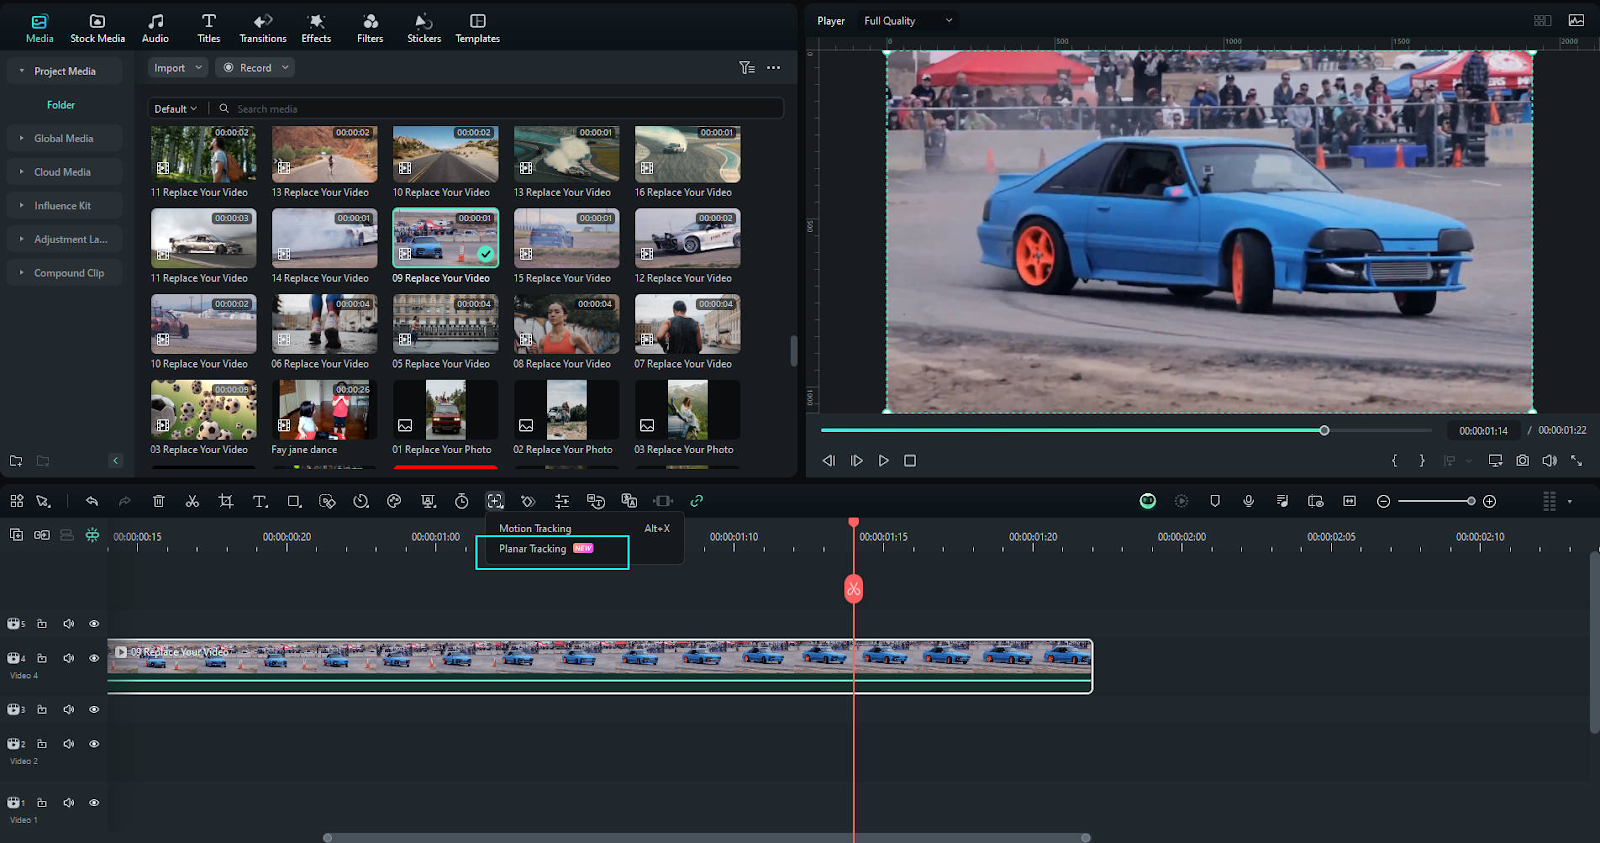
Method 2: Click the tracking icon below the timeline and choose Planar Tracking.
Method 3: Go to the top menu and click Tools > Video > Planar Tracking.
Step 3: Choose a Tracking Mode
Filmora has two types of Planar Trackers to choose from:
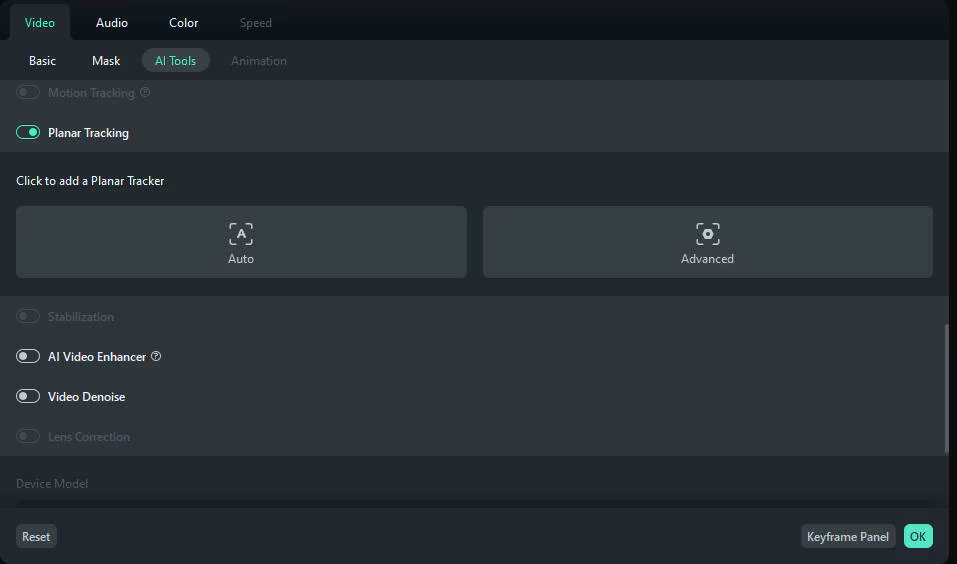
Auto Planar Tracker
1. Select the Target: Click “Auto” mode, then in the preview window, pick the object you want to track and adjust the four points to fit it.

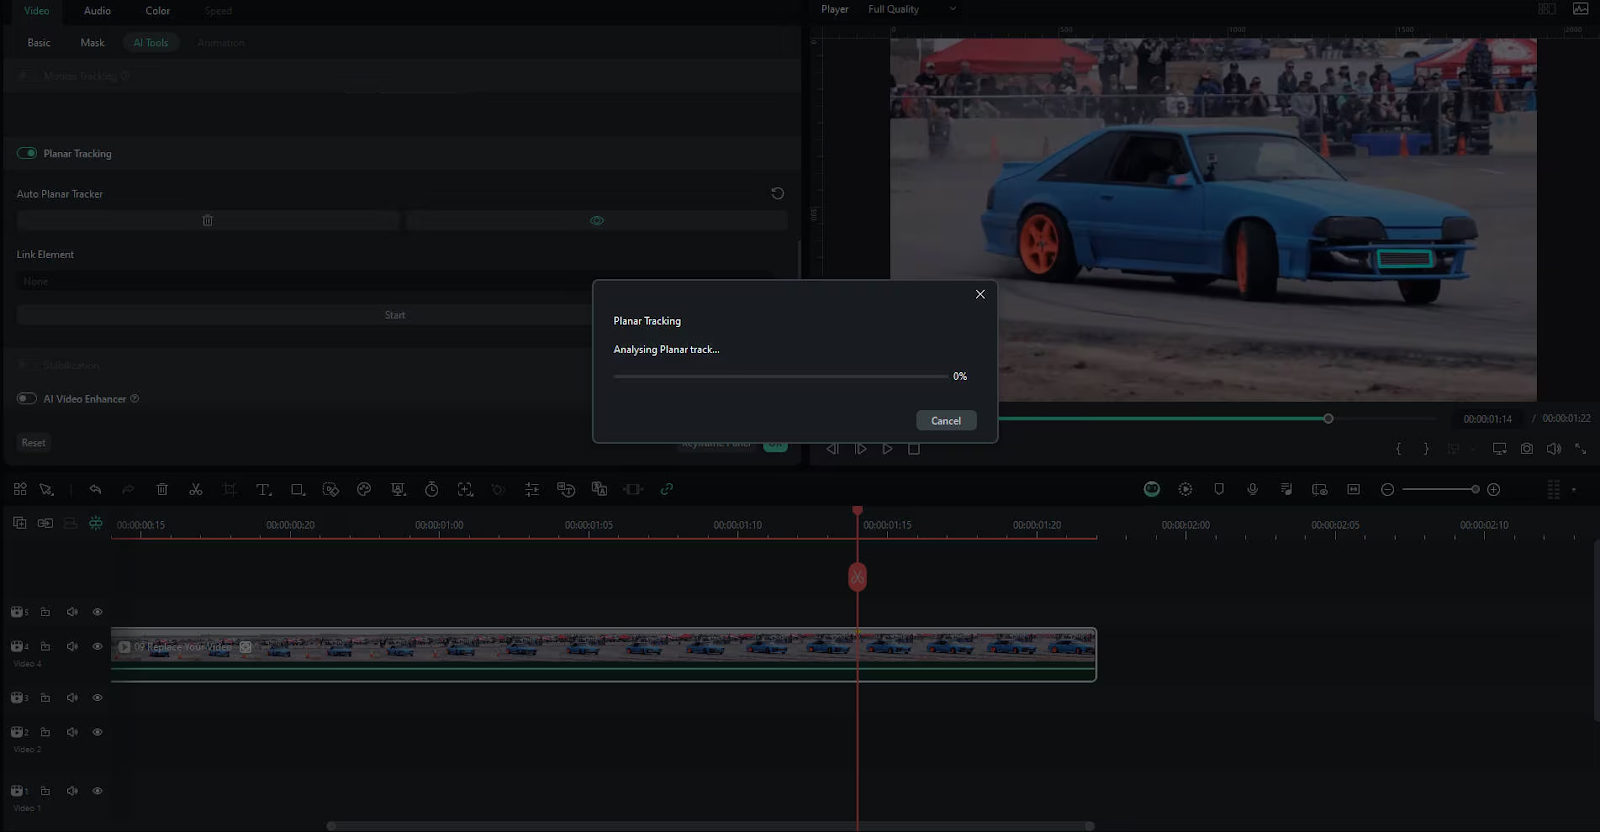
2. Start Tracking: Click “Start,” and Filmora video editing software will track the object. This only works on one clip at a time.
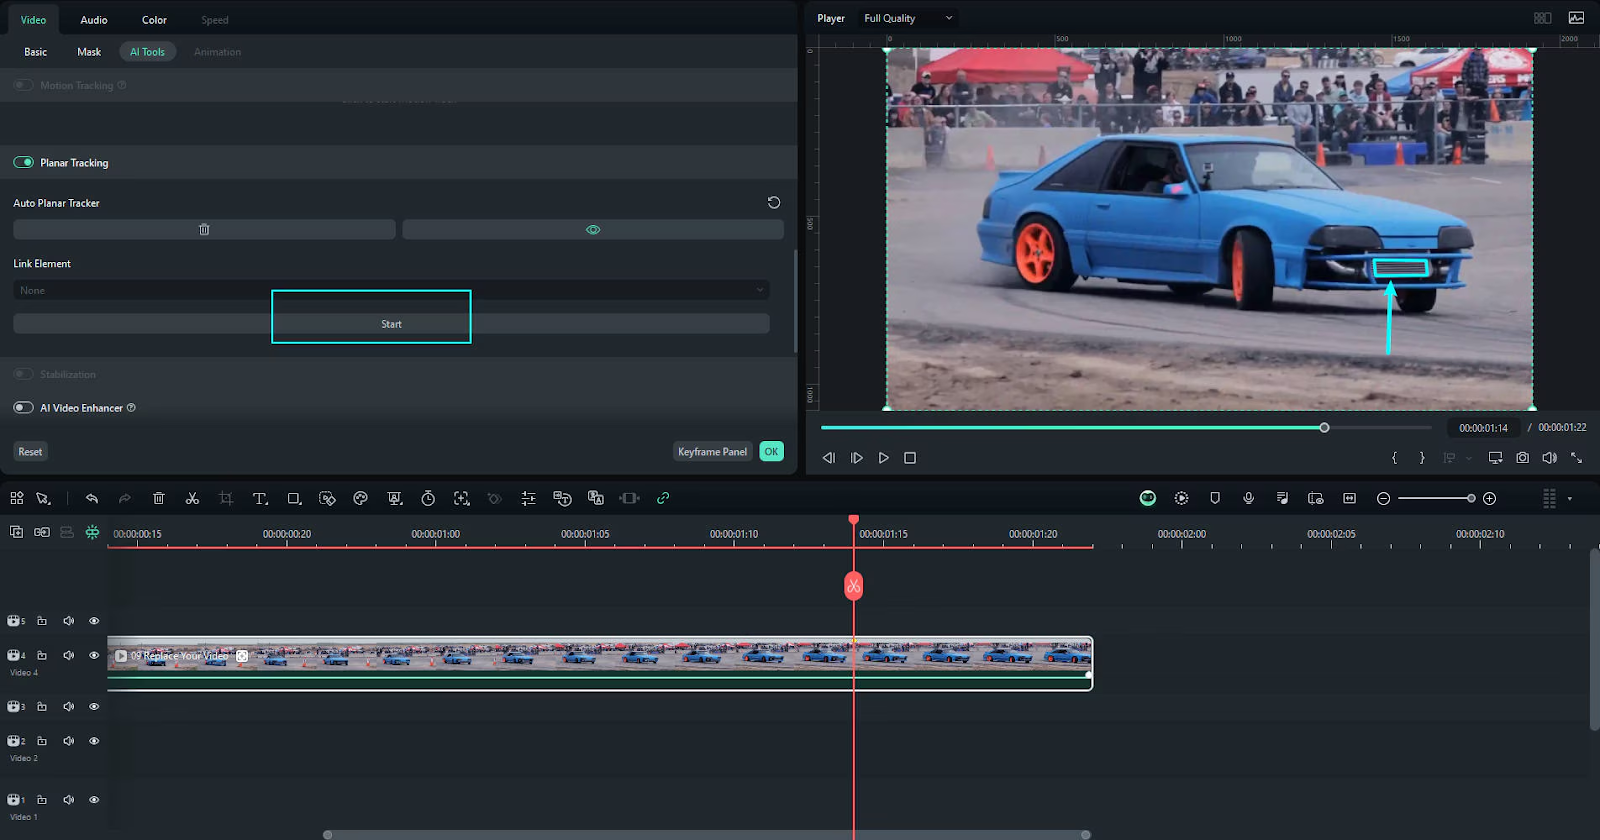
3. Check the Tracking: Play the video to ensure the points follow the object correctly after it’s done. You can hide or show the tracker if needed.
Advanced Planar Tracker
1. Select the Target: Click “Advanced” mode, then pick the object you want to track and adjust the four points around it.
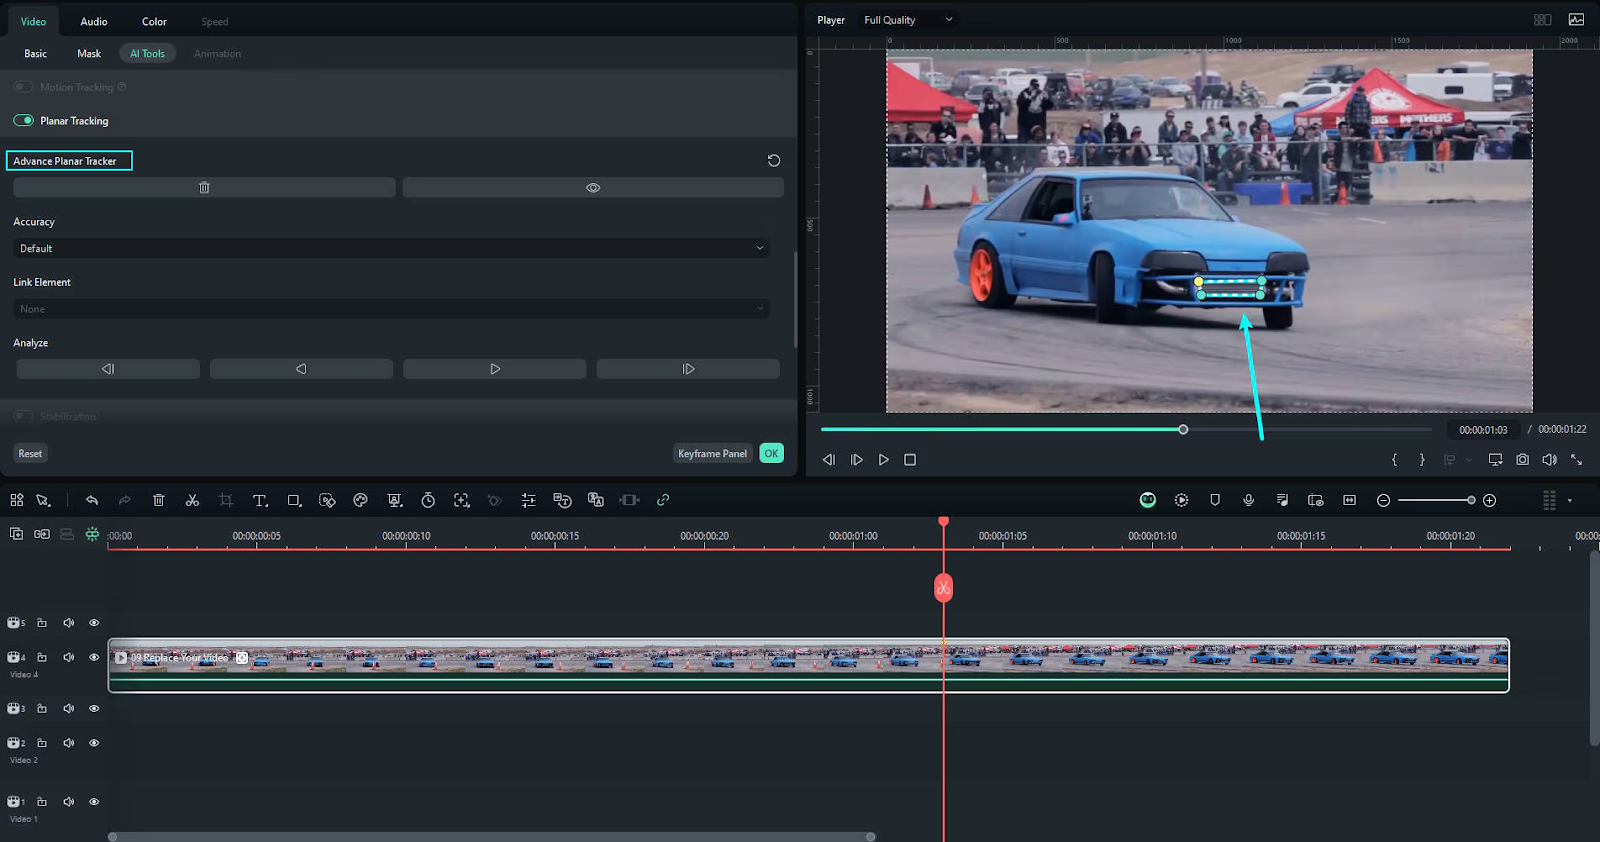
2. Start Tracking: You can choose different tracking options. If your video is shaky, frame-by-frame analysis works best. To stop tracking anytime, just click anywhere.
3. Check and Fix Tracking: Play the video to see if the points follow the object smoothly. You can adjust and re-track specific parts if they don’t look right.
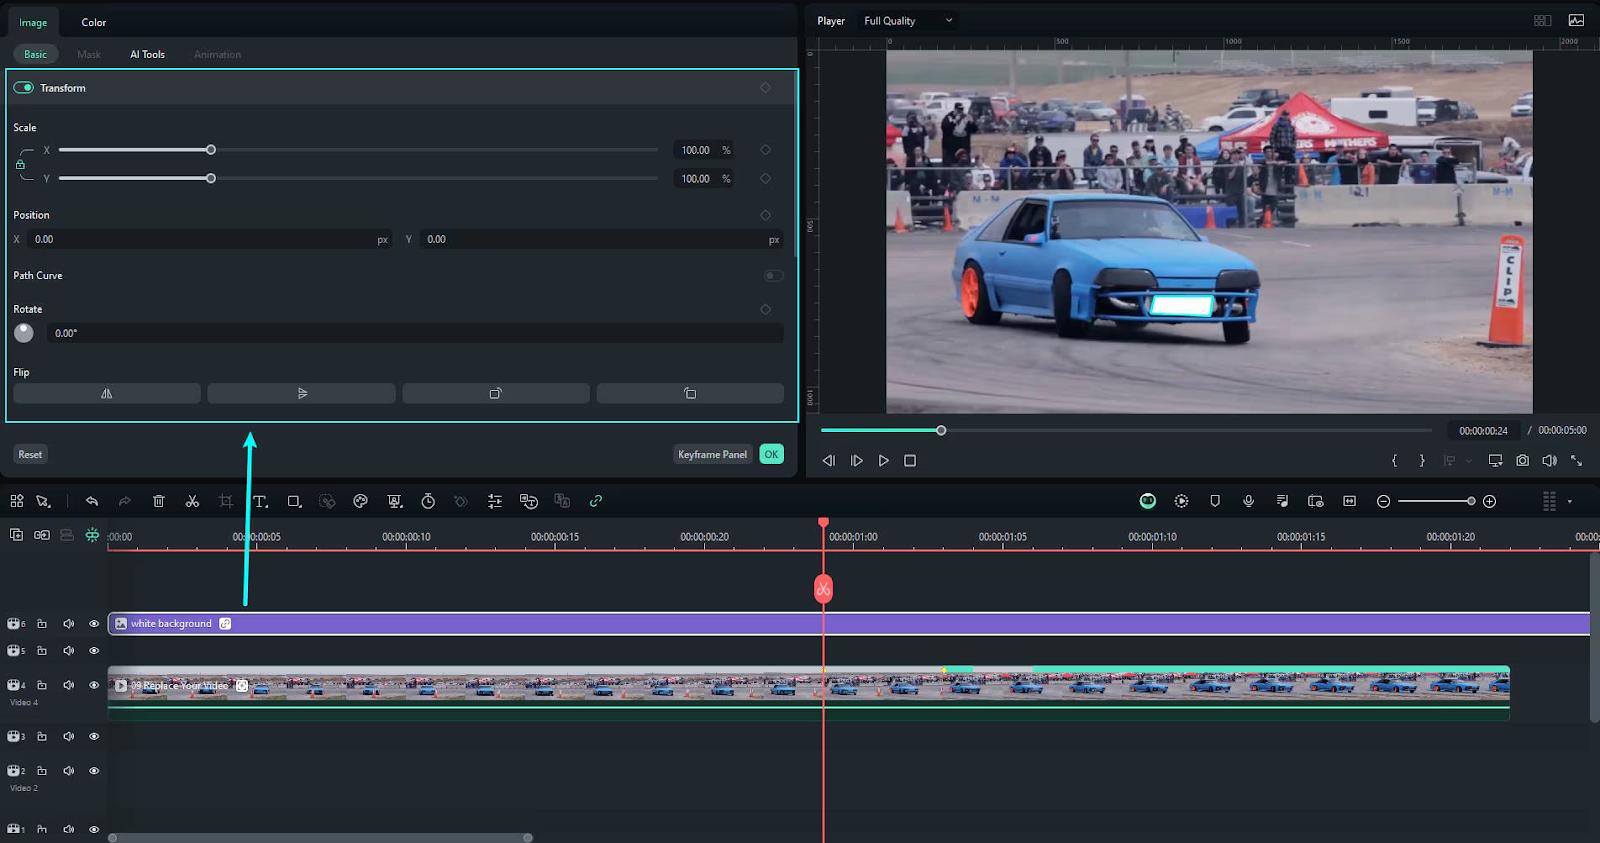
Step 4: Add Linked Elements
You can link any text, image, or video you want to appear as part of your tracked object.
Choose a Clip: Add your new element (like a video or picture) above the current clip on the timeline and link it.

Step 5: Adjust Your Linked Element
After you’ve added the element, you can resize and move it so it fits perfectly on your tracked object. Adjust things like size and position to make it look natural.
Step 6: Export and Share
Once you’re happy with how everything looks, click “Export,” choose your format, and save your video. Now, it’s ready to share with others!
And that’s it! Planar Tracking is a powerful tool, but with these easy steps, you can create cool effects quickly.
Conclusion
You can create professional and engaging videos with video editing software, such as Filmora’s multi-camera editing, keyframe animation, and planar tracking. These advanced features might seem tricky, but they’ll become second nature with some practice. So experiment with these techniques, and watch your video editing skills soar!